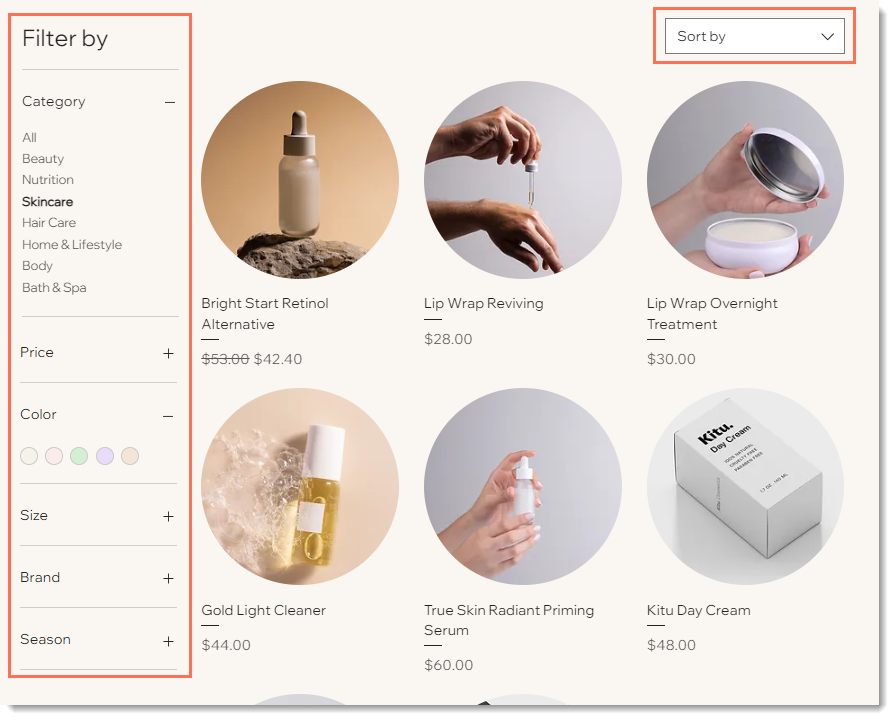
In the world of ecommerce, providing a seamless and enjoyable shopping experience is crucial for retaining customers and driving sales. One effective way to achieve this is by offering comprehensive filter and sort options for your product collections. These features simplify the product search process, helping customers find exactly what they're looking for quickly and easily. In this blog post, we'll guide you through the process of adding filter and sort options to your Shopify store using built-in features, making it beginner-friendly and packed with helpful tips and data.
Why Filter & Sort Options Matter
Before diving into the steps, let's understand why these features are essential for your ecommerce store:
-
Improved User Experience: Filters allow customers to narrow down their search to find products that meet their specific needs, while sorting options help them prioritise what matters most, whether it's price, popularity, or new arrivals.
-
Increased Sales: A study by Smashing Magazine found that 50% of online shoppers use navigation and filters to find products. By facilitating a more efficient search process, you're likely to see an increase in conversion rates.
-
Enhanced SEO: Unique and well-organised product descriptions and categories can improve your store's search engine ranking, attracting more organic traffic.
Step-by-Step Guide to Adding Filter & Sort Options
Step 1: Define Filter Criteria
Start by identifying the key attributes by which your customers can filter products. Consider the following options:
- Size: Offer sizes like Small, Medium, Large, etc.
- Colour: Provide a range of colours such as Red, Blue, Green, etc.
- Price Range: Set up price filters like Under $50, $50-$100, Over $100
- Brand: List the available brands in your store
- Category: Divide products into categories like Tops, Bottoms, Accessories, etc.
- Material: Specify materials such as Cotton, Polyester, Leather, etc.
- Rating: Allow filtering by customer ratings from 1 to 5 stars
Pro Tip: Analyse your store's data to see which filters are most frequently used by your customers. This will help you prioritise the most important criteria.

Step 2: Create Collections
Use Shopify’s built-in collections to organise your products by the defined filter criteria.
-
Navigate to Collections: Go to your Shopify admin dashboard and click on “Products” and then “Collections”.
-
Create a New Collection: Click “Create collection” and fill in the necessary details such as the title and description.
-
Set Up Automated Collections: For each filter criterion, create an automated collection. For example:
• Size Collection: Create collections like “Size: Small”, “Size: Medium”, etc., and set conditions to automatically include products based on size.
• Colour Collection: Similarly, create collections for each colour.
• Price Range Collection: Create collections for different price ranges by setting conditions based on product price.
- Repeat for Other Criteria: Follow the same steps for categories, brands, materials, and ratings.
Pro Tip: Use tags and product types to help automate the collection process more efficiently.

Step 3: Organise Collections in Navigation
Now, make it easy for customers to access these collections through your store’s navigation.
- Navigate to Navigation: In your Shopify admin, go to “Online Store” and then “Navigation”.
- Create a New Menu: Click “Add menu” to create a new menu for your filters.
-
Add Menu Items: Add menu items for each collection you created.
- Repeat for Other Criteria: Continue adding menu items for categories, brands, materials, and ratings.
Pro Tip: Use nested menus to keep the navigation clean and organised. For example, create a main menu item called “Filter by Size” with sub-menu items for each size.

Step 4: Enable Sorting Options
Shopify provides built-in sorting options that you can enable for your collections.
- Go to Collection Pages: Navigate to “Online Store” and then “Themes”.
- Customise Theme: Click “Customise” next to your active theme.
- Navigate to Collection Pages: In the theme editor, navigate to a collection page.
- Enable Sorting: In the collection settings, ensure that the sorting options are enabled. Shopify typically offers default sorting options like “Price: Low to High”, “Price: High to Low”, “Best Selling”, “Alphabetical”, etc.
Pro Tip: Ensure that these sorting options are visible and easy to use on both desktop and mobile versions of your store.
Optional: Use Shopify Search & Discovery App
If you need more advanced filtering and sorting capabilities, consider using the Shopify Search & Discovery app.
- Install the App: Go to the Shopify App Store and search for “Shopify Search & Discovery”. Click “Add app” and follow the installation instructions.
- Configure the App: Use the app to set up advanced filters and sorting options. This app provides more flexibility and customisation compared to the built-in features.

Best Practices for Effective Filter and Sort Options
-
Keep It Simple: Avoid cluttering the interface with too many options. Focus on the most important criteria that matter to your customers.
-
Use Clear Labels: Ensure that filter and sort labels are clear and easy to understand. For example, instead of "Under $50", use "Price: Under $50".
-
Optimise for Mobile: Make sure your filters and sort options are mobile-friendly, as a significant portion of online shopping is done on mobile devices.
- Provide Multiple Filters: Allow customers to combine multiple filters for a more refined search. For example, they should be able to filter by both size and color simultaneously.
Conclusion
Adding filter and sort options to your Shopify store using built-in features can significantly enhance the shopping experience, leading to higher customer satisfaction and increased sales.
By following this step-by-step guide, you can implement these features effectively and ensure they are tailored to meet the needs of your customers.
Remember, a well-organised and user-friendly store not only attracts more visitors but also encourages them to return for future purchases.


